{% endtab %}
{% endtabs %}
{% hint style="info" %} **참고사항**
설치가 확인되었다면 생성한 index.php 파일 삭제를 권장드립니다.
{% endhint %}
### (3) PHP 모듈 추가하기
설치 가능한 PHP 모듈을 검색한 후, 추가로 필요한 모듈을 설치할 수 있습니다.
여기서는 MySQL/MariaDB와 연동하기 위해 필요한 php-mysqlnd 모듈을 설치했습니다.
{% tabs %}
{% tab title="CentOS / Rocky / Almalinux" %}
```shell-session
$ yum info php-*
$ sudo yum install php-mysqlnd
```
{% endtab %}
{% tab title="Ubuntu" %}
```shell-session
$ apt-cache show php-*
$ sudo apt-get install php-mysqlnd
```
{% endtab %}
{% endtabs %}
## 4. MySQL 설치하기
### (1) MySQL 설치하기
{% tabs %}
{% tab title="CentOS / Rocky / Almalinux" %}
[MySQL Community Downloads](https://dev.mysql.com/downloads/repo/yum/)에 접속하여 설치할 OS 버전의 RPM Package를 선택한 후, MySQL Yum Repository 링크를 복사합니다.
{% endtab %}
{% tab title="Ubuntu" %}
[MySQL Community Downloads](https://dev.mysql.com/downloads/repo/apt/)에 접속하여 DEB Package를 선택한 후, MySQL APT Repository 링크를 복사합니다.
{% endtab %}
{% endtabs %}
복사한 링크를 통해 MySQL Repository를 설치한 후, MySQL 설치를 진행합니다.
ubuntu의 경우, Package Configuration 화면을 통해 비밀번호를 설정합니다.
{% tabs %}
{% tab title="CentOS / Rocky / Almalinux" %}
```shell-session
$ sudo yum install https://dev.mysql.com/get/mysql80-community-release-el7-7.noarch.rpm
$ sudo yum install mysql-server
```
{% endtab %}
{% tab title="Ubuntu" %}
```shell-session
$ wget https://dev.mysql.com/get/mysql-apt-config_0.8.23-1_all.deb
$ sudo dpkg -i mysql-apt-config_0.8.23-1_all.deb
Which MySQL product to you wish to configure? Ok
$ sudo apt-get update
$ sudo apt-get install mysql-server
Enter root password: 비밀번호 입력
Re-enter root password: 비밀번호 입력
Select default authentication plugin: Use Strong Password Encryption (RECOMMENDED)
```
{% endtab %}
{% endtabs %}
### (2) MySQL 설치 확인하기
설치가 완료되었다면 MySQL 서비스를 구동한 후, active 상태인지 확인합니다.
{% tabs %}
{% tab title="CentOS / Rocky / Almalinux" %}
```shell-session
$ sudo systemctl start mysqld
$ sudo systemctl enable mysqld
$ systemctl status mysqld
```
{% endtab %}
{% tab title="Ubuntu" %}
```shell-session
$ sudo systemctl start mysql
$ sudo systemctl enable mysql
$ systemctl status mysql
```
{% endtab %}
{% endtabs %}
그리고 MySQL에 접속해봅니다.
{% tabs %}
{% tab title="CentOS / Rocky / Almalinux" %}
root 계정의 임시 비밀번호를 확인한 후, MySQL에 접속합니다.
```shell-session
$ sudo grep 'temporary password' /var/log/mysqld.log
2022-10-05T06:33:51.116320Z 1 [Note] A temporary password is generated for root@localhost: y(>j2pun:AN/
$ mysql -u root -p
```
{% endtab %}
{% tab title="Ubuntu" %}
설정한 비밀번호를 입력하여 MySQL에 접속합니다.
```shell-session
$ mysql -u root -p
```
{% endtab %}
{% endtabs %}
### (3) MySQL 기본 보안 설정하기
mysql\_secure\_installation을 통해 root 비밀번호 변경과 기본 보안 설정을 합니다.
{% tabs %}
{% tab title="CentOS / Rocky / Almalinux" %}
```shell-session
$ sudo mysql_secure_installation
=== root 계정의 임시 비밀번호 입력 ===
Enter password for user root:
=== root 계정의 새 비밀번호 입력 ===
New password:
Re-enter new password:
=== root 계정의 비밀번호 변경 여부 ===
Change the password for root ? ((Press y|Y for Yes, any other key for No) : n
=== 익명의 사용자 삭제 여부 ===
Remove anonymous users? (Press y|Y for Yes, any other key for No) : y
=== 원격 접속 차단 여부 ===
Disallow root login remotely? (Press y|Y for Yes, any other key for No) : n
=== test DB 및 접속 정보 삭제 여부 ===
Remove test database and access to it? (Press y|Y for Yes, any other key for No) : y
=== 현재 설정한 값들의 적용 여부 ===
Reload privilege tables now? (Press y|Y for Yes, any other key for No) : y
```
{% endtab %}
{% tab title="Ubuntu" %}
```shell-session
$ sudo mysql_secure_installation
=== root 계정의 비밀번호 입력 ===
Enter password for user root:
=== 비밀번호 복잡성 설정 여부 ===
Press y|Y for Yes, any other key for No: n
=== root 계정의 비밀번호 변경 여부 ===
Change the password for root ? ((Press y|Y for Yes, any other key for No) : n
=== 익명의 사용자 삭제 여부 ===
Remove anonymous users? (Press y|Y for Yes, any other key for No) : y
=== 원격 접속 차단 여부 ===
Disallow root login remotely? (Press y|Y for Yes, any other key for No) : n
=== test DB 및 접속 정보 삭제 여부 ===
Remove test database and access to it? (Press y|Y for Yes, any other key for No) : y
=== 현재 설정한 값들의 적용 여부 ===
Reload privilege tables now? (Press y|Y for Yes, any other key for No) : y
```
{% endtab %}
{% endtabs %}
### (4) PHP와 연동 확인하기
새로 설정한 비밀번호로 MySQL에 접속한 후, test 데이터베이스와 test 사용자를 생성합니다.
```shell-session
$ mysql -u root -p
mysql> create database test;
mysql> create user 'test'@'%' identified by '비밀번호';
mysql> grant all privileges on test.* to 'test'@'%';
```
그리고 PHP가 test 데이터베이스에 잘 접속하는지 확인하는 test.php 파일을 /var/www/html 디렉터리에 생성합니다.
{% tabs %}
{% tab title="CentOS / Rocky / Almalinux" %}
```shell-session
$ sudo vi /var/www/html/test.php
$ sudo systemctl restart httpd
```
{% endtab %}
{% tab title="Ubuntu" %}
```shell-session
$ sudo vi /var/www/html/test.php
$ sudo systemctl restart apache2
```
{% endtab %}
{% endtabs %}
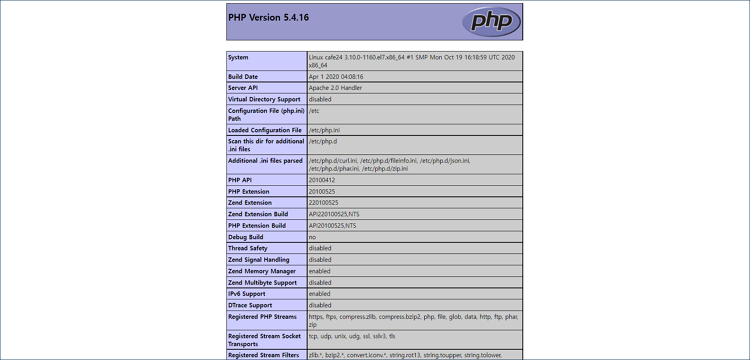
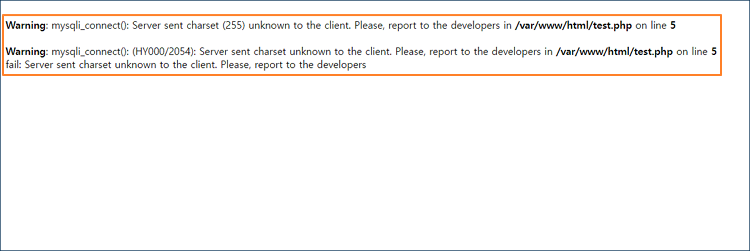
** 공인 IP/test.php**로 접속하여 PHP와 MySQL이 잘 연동되는지 확인합니다.
{% hint style="danger" %} **주의사항**
centos 7의 경우 php를 설치하면 5.x 버전으로 설치됩니다.
하지만 mysql 8.x를 사용하기 위해서는 php 7.x 이상으로 설치되어야 하기 때문에 버전을 업그레이드해야 합니다.
따라서 위와 같은 에러가 발생하였을 경우, 기존에 설치된 php 5.4를 삭제하고 다시 설치하면 됩니다.
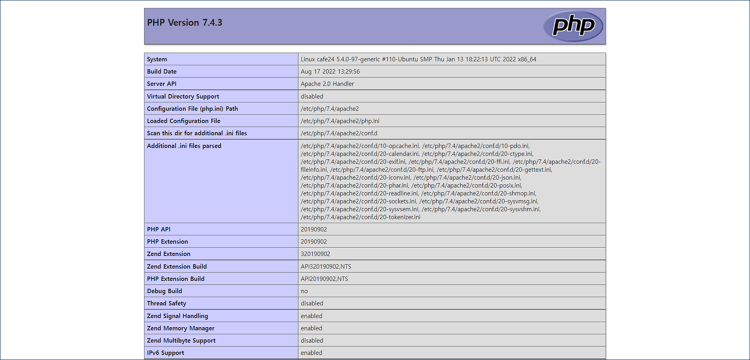
여기서는 php 7.4로 재설치했습니다.
{% endhint %}
```shell-session
$ sudo yum remove php*
$ sudo yum install http://rpms.remirepo.net/enterprise/remi-release-7.rpm
$ sudo yum-config-manager --enable remi-php74
$ sudo yum install php php-mysqlnd
$ php -v
PHP 7.4.32 (cli) (built: Sep 28 2022 09:09:55) ( NTS )
$ sudo systemctl restart httpd
```
## 5. MariaDB 설치하기
### (1) MariaDB 설치하기
[Download MariaDB Server](https://mariadb.org/download/?t=repo-config)에 접속하여 설치할 OS 버전과 원하는 MariaDB 버전을 선택한 후, 리포지토리 또는 명령어를 복사합니다.
{% tabs %}
{% tab title="CentOS / Rocky / Almalinux" %}
{% endtab %}
{% tab title="Ubuntu" %}
{% endtab %}
{% endtabs %}
복사한 리포지토리를 통해 Mariadb.repo를 생성하거나 복사한 명령어를 실행한 후, 설치를 진행합니다.
{% tabs %}
{% tab title="CentOS / Rocky / Almalinux" %}
```shell-session
$ sudo vi /etc/yum.repos.d/MariaDB.repo
# MariaDB 10.3 CentOS repository list - created 2022-09-30 08:49 UTC
# https://mariadb.org/download/
[mariadb]
name = MariaDB
baseurl = https://tw1.mirror.blendbyte.net/mariadb/yum/10.3/centos7-amd64
gpgkey=https://tw1.mirror.blendbyte.net/mariadb/yum/RPM-GPG-KEY-MariaDB
gpgcheck=1
$ sudo yum install MariaDB-server MariaDB-client
```
{% endtab %}
{% tab title="Ubuntu" %}
```shell-session
$ sudo apt-get install apt-transport-https curl
$ sudo curl -o /etc/apt/trusted.gpg.d/mariadb_release_signing_key.asc 'https://mariadb.org/mariadb_release_signing_key.asc'
$ sudo sh -c "echo 'deb https://ftp.ubuntu-tw.org/mirror/mariadb/repo/10.3/ubuntu focal main' >>/etc/apt/sources.list"
$ sudo apt-get install mariadb-server
```
{% endtab %}
{% endtabs %}
### (2) MariaDB 설치 확인하기
설치가 완료되었다면 MariaDB 서비스를 구동한 후, active 상태인지 확인합니다.
```shell-session
$ sudo systemctl start mariadb
$ sudo systemctl enable mariadb
$ systemctl status mariadb
```
그리고 MariaDB에 접속해봅니다.
{% tabs %}
{% tab title="CentOS / Rocky / Almalinux" %}
초기에는 비밀번호가 없기 때문에 비밀번호 없이 MariaDB에 접속합니다.
```shell-session
$ mysql -u root
```
{% endtab %}
{% tab title="Ubuntu" %}
초기에는 비밀번호가 없기 때문에 비밀번호 없이 root 권한으로 MariaDB에 접속합니다.
```shell-session
$ sudo mysql -u root
```
{% endtab %}
{% endtabs %}
### (3) MariaDB 기본 보안 설정하기
mysql\_secure\_installation을 통해 root 비밀번호 설정과 기본 보안 설정을 합니다.
```shell-session
$ sudo mysql_secure_installation
=== 현재 root 계정의 비밀번호가 없기 때문에 엔터 입력 ===
Enter current password for root (enter for none):
=== root 계정의 비밀번호 설정 ===
Set root password? [Y/n] y
New password:
Re-enter new password:
=== 익명의 사용자 삭제 여부 ===
Remove anonymous users? [Y/n] y
=== 원격 접속 차단 여부 ===
Disallow root login remotely? [Y/n] n
=== test DB 및 접속 정보 삭제 여부 ===
Remove test database and access to it? [Y/n] y
=== 현재 설정한 값들의 적용 여부 ===
Reload privilege tables now? [Y/n] y
```
### (4) PHP와 연동 확인하기
새로 설정한 비밀번호로 MariaDB에 접속한 후, test 데이터베이스와 test 사용자를 생성합니다.
```shell-session
$ mysql -u root -p
MariaDB [(none)]> create database test;
MariaDB [(none)]> create user 'test'@'%' identified by '비밀번호';
MariaDB [(none)]> grant all privileges on test.* to 'test'@'%';
```
그리고 PHP가 test 데이터베이스에 잘 접속하는지 확인하는 test.php 파일을 /var/www/html 디렉터리에 생성합니다.
```shell-session
$ sudo vi /var/www/html/test.php
$ sudo systemctl restart httpd
```
** 공인 IP/test.php**로 접속하여 PHP와 MariaDB가 잘 연동되는지 확인합니다.
{% hint style="info" %} **참고사항**
MySQL/MariaDB 접속 시, 접속한 IP에 대한 DNS 질의를 하여 호스트 이름을 확인하는 과정을 거칩니다.
하지만 DNS 응답이 느리거나 장애가 발생할 경우, MySQL/MariaDB 접속이 지연되는 현상이 발생할 수 있기 때문에
아래와 같이 **skip-name-resolve** 옵션 사용하여, DNS 질의를 하지 않고 향상된 속도로 접속할 수 있습니다.
{% endhint %}
{% tabs %}
{% tab title="CentOS / Rocky / Almalinux" %}
my.cnf 설정 파일에 skip-name-resolve 옵션을 추가합니다.
```sh
$ sudo vi /etc/my.cnf
[mysqld]
skip-name-resolve
```
MySQL 또는 MariaDB 서비스를 재시작한 후, 설정을 확인합니다.
```sh
mysql> SHOW VARIABLES LIKE 'skip_name_resolve';
+-------------------+-------+
| Variable_name | Value |
+-------------------+-------+
| skip_name_resolve | ON |
+-------------------+-------+
1 row in set (0.001 sec)
```
{% endtab %}
{% tab title="Ubuntu" %}
my.cnf 설정 파일에 skip-name-resolve 옵션을 추가합니다.
```sh
$ sudo vi /etc/mysql/my.cnf
[mysqld]
skip-name-resolve
```
MySQL 또는 MariaDB 서비스를 재시작한 후, 설정을 확인합니다.
```sh
mysql> SHOW VARIABLES LIKE 'skip_name_resolve';
+-------------------+-------+
| Variable_name | Value |
+-------------------+-------+
| skip_name_resolve | ON |
+-------------------+-------+
1 row in set (0.001 sec)
```
{% endtab %}
{% endtabs %}
---
# Agent Instructions
This documentation is published with GitBook. GitBook is the documentation platform designed so that both humans and AI agents can read, navigate, and reason over technical content effectively. Learn more at gitbook.com.
## Querying This Documentation
If you need additional information that is not directly available in this page, you can query the documentation dynamically by asking a question.
Perform an HTTP GET request on the current page URL with the `ask` query parameter:
```
GET https://docs.cafe24cloud.com/home/server/server/config/apm.md?ask=
```
The question should be specific, self-contained, and written in natural language.
The response will contain a direct answer to the question and relevant excerpts and sources from the documentation.
Use this mechanism when the answer is not explicitly present in the current page, you need clarification or additional context, or you want to retrieve related documentation sections.


 centos 7의 경우 php를 설치하면 5.x 버전으로 설치됩니다.
하지만 mysql 8.x를 사용하기 위해서는 php 7.x 이상으로 설치되어야 하기 때문에 버전을 업그레이드해야 합니다.
따라서 위와 같은 에러가 발생하였을 경우, 기존에 설치된 php 5.4를 삭제하고 다시 설치하면 됩니다.
여기서는 php 7.4로 재설치했습니다.
{% endhint %}
```shell-session
$ sudo yum remove php*
$ sudo yum install http://rpms.remirepo.net/enterprise/remi-release-7.rpm
$ sudo yum-config-manager --enable remi-php74
$ sudo yum install php php-mysqlnd
$ php -v
PHP 7.4.32 (cli) (built: Sep 28 2022 09:09:55) ( NTS )
$ sudo systemctl restart httpd
```
## 5. MariaDB 설치하기
### (1) MariaDB 설치하기
[Download MariaDB Server](https://mariadb.org/download/?t=repo-config)에 접속하여 설치할 OS 버전과 원하는 MariaDB 버전을 선택한 후, 리포지토리 또는 명령어를 복사합니다.
{% tabs %}
{% tab title="CentOS / Rocky / Almalinux" %}
centos 7의 경우 php를 설치하면 5.x 버전으로 설치됩니다.
하지만 mysql 8.x를 사용하기 위해서는 php 7.x 이상으로 설치되어야 하기 때문에 버전을 업그레이드해야 합니다.
따라서 위와 같은 에러가 발생하였을 경우, 기존에 설치된 php 5.4를 삭제하고 다시 설치하면 됩니다.
여기서는 php 7.4로 재설치했습니다.
{% endhint %}
```shell-session
$ sudo yum remove php*
$ sudo yum install http://rpms.remirepo.net/enterprise/remi-release-7.rpm
$ sudo yum-config-manager --enable remi-php74
$ sudo yum install php php-mysqlnd
$ php -v
PHP 7.4.32 (cli) (built: Sep 28 2022 09:09:55) ( NTS )
$ sudo systemctl restart httpd
```
## 5. MariaDB 설치하기
### (1) MariaDB 설치하기
[Download MariaDB Server](https://mariadb.org/download/?t=repo-config)에 접속하여 설치할 OS 버전과 원하는 MariaDB 버전을 선택한 후, 리포지토리 또는 명령어를 복사합니다.
{% tabs %}
{% tab title="CentOS / Rocky / Almalinux" %}

